Pixel Level Analysis
The foundation of the multiplexed imaging analysis suite provided by rakaia is toolbox of features associated with pixel level analysis. These features include components and processing steps that allow users to make one or additive multiplexed images for one or more ROIs in a session. Using a variety of customizable inputs, users can generate publication-worthy ROI images using a combination of image filtering, scaling, and recolouring.
Image representation using rasterization
rakaia represents channel images using rasterisation, which involves the conversion of greyscale arrays into RGB 3-channel formats. Internally, rakaia will store the raw 2D greyscale arrays for every channel in an ROI during blending, and will also make a cache of each channel as it is modified for the canvas. The conversion from greyscale to RGB format is necessary for the additive coloured blend to occur. Basic information about storing greyscale and RGB images in numpy can be found here.
Channel modification
Each channel for the current canvas blend should be selected in the Channel selection dropdown menu. If a channel has been added to the blend, it is available for selection under the Channel modification sidetab, adjacent to the canvas:
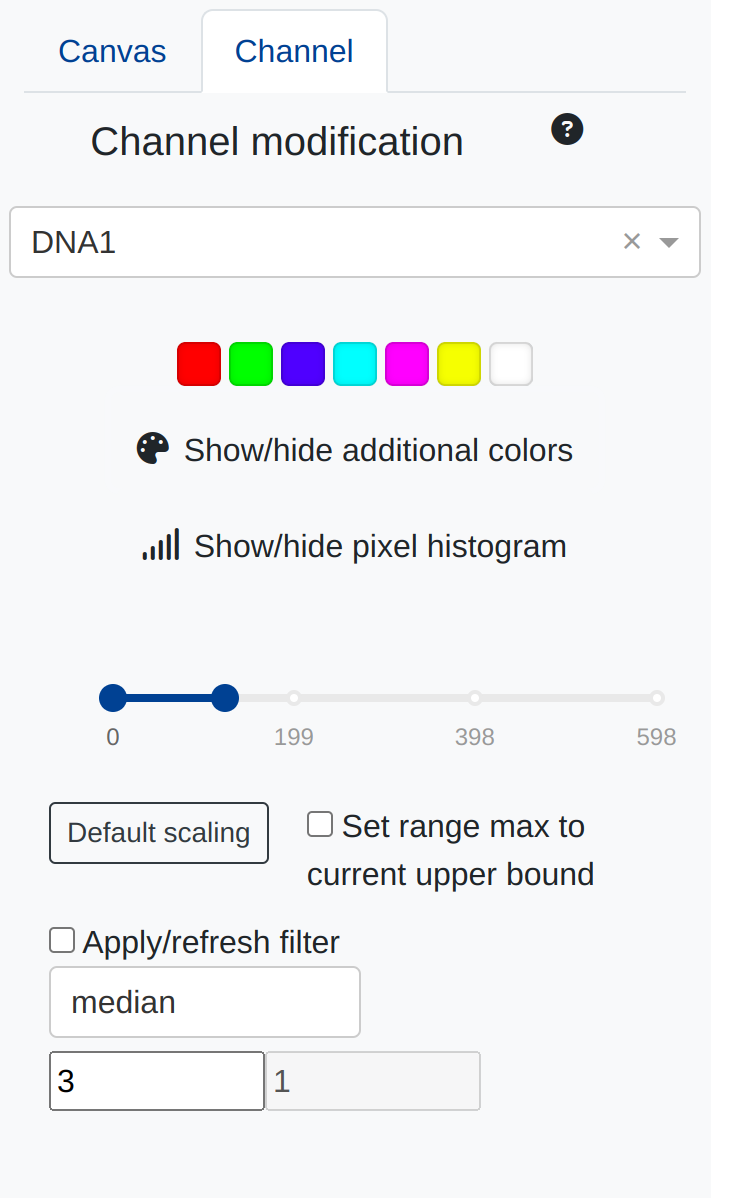
The most recently selected channel will automatically populate this dropdown selection, and users can toggle among channels to alter their properties. Toggeling between channels will auto-update the various input widgets with any previously selected channel parameters, if they exist. These parameters are described below.
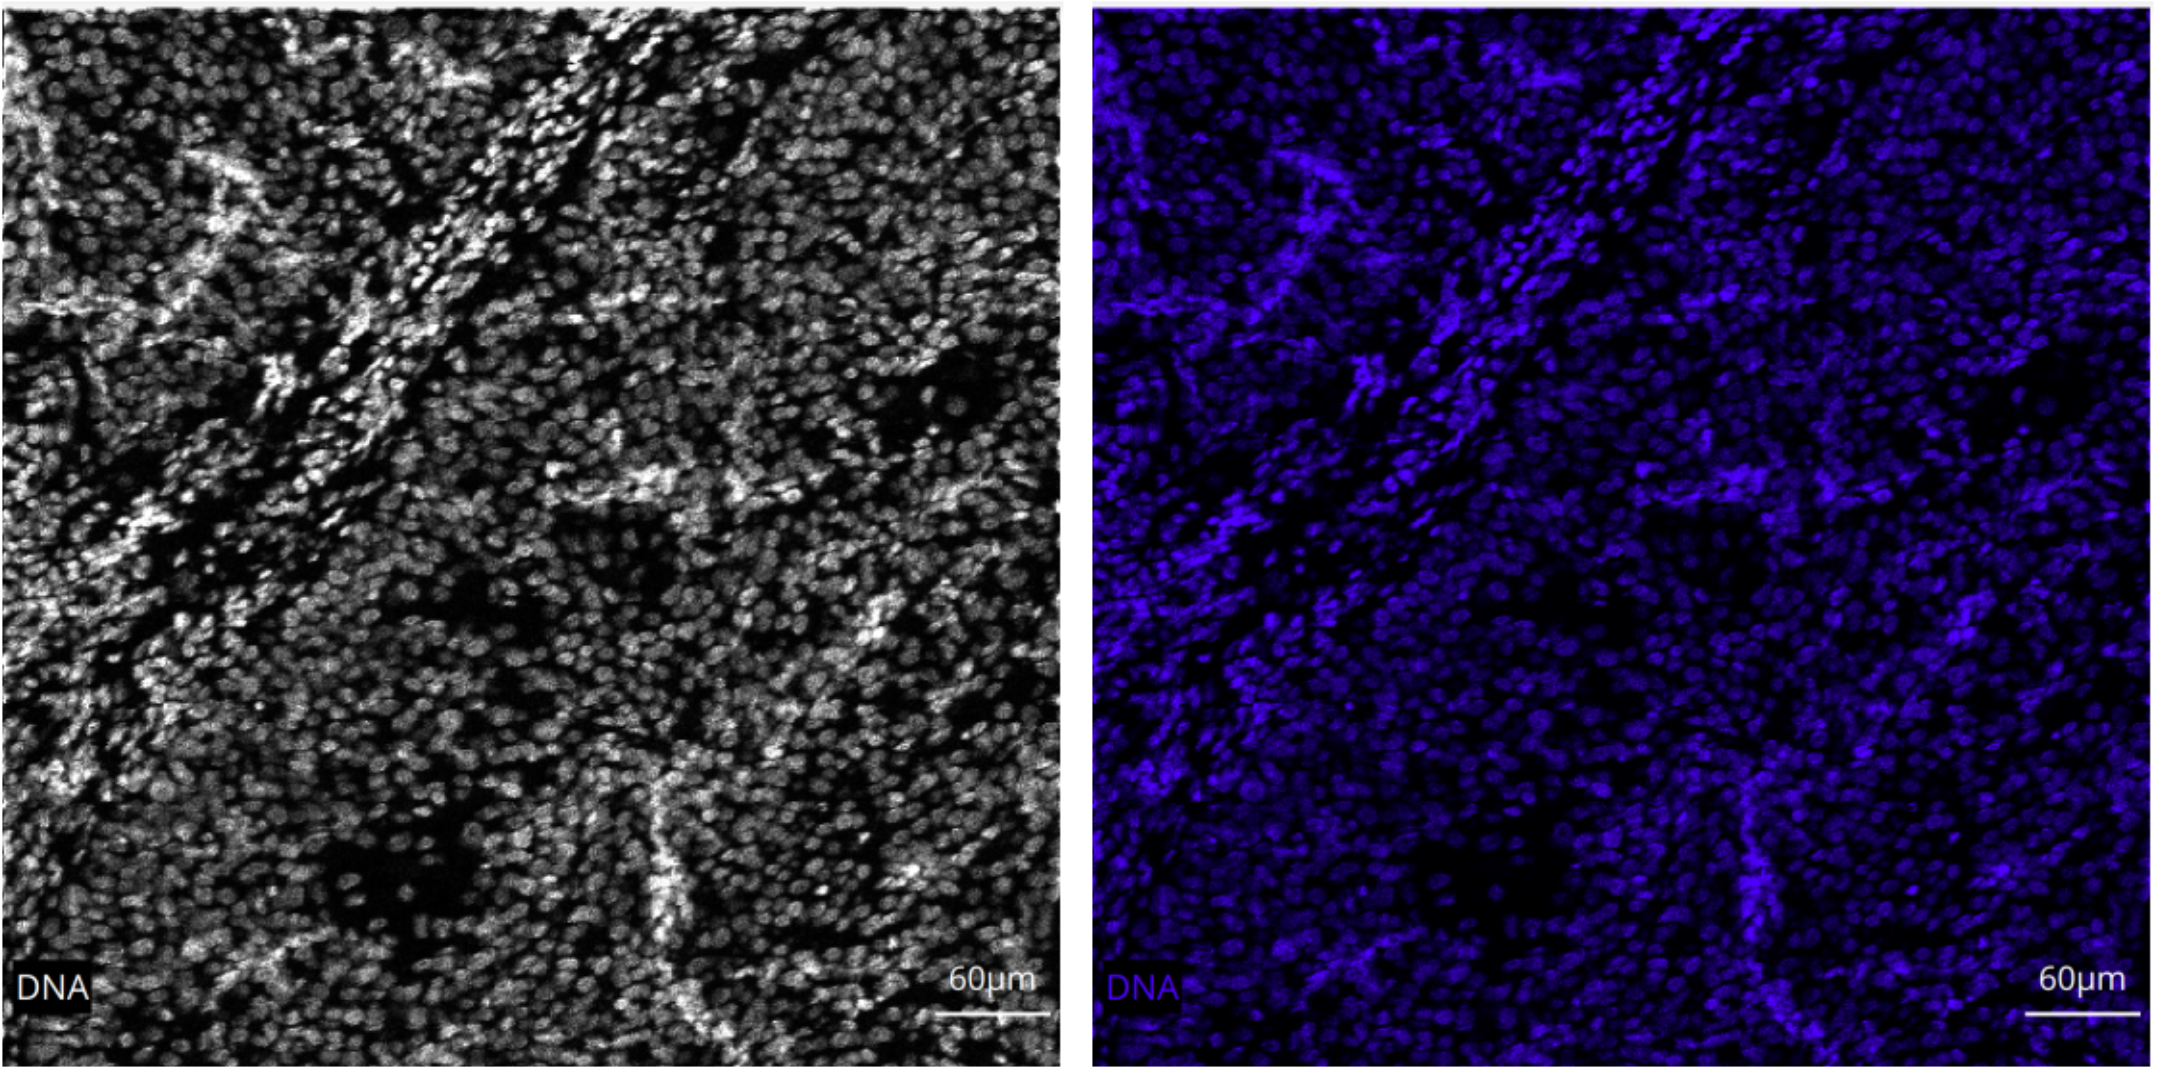
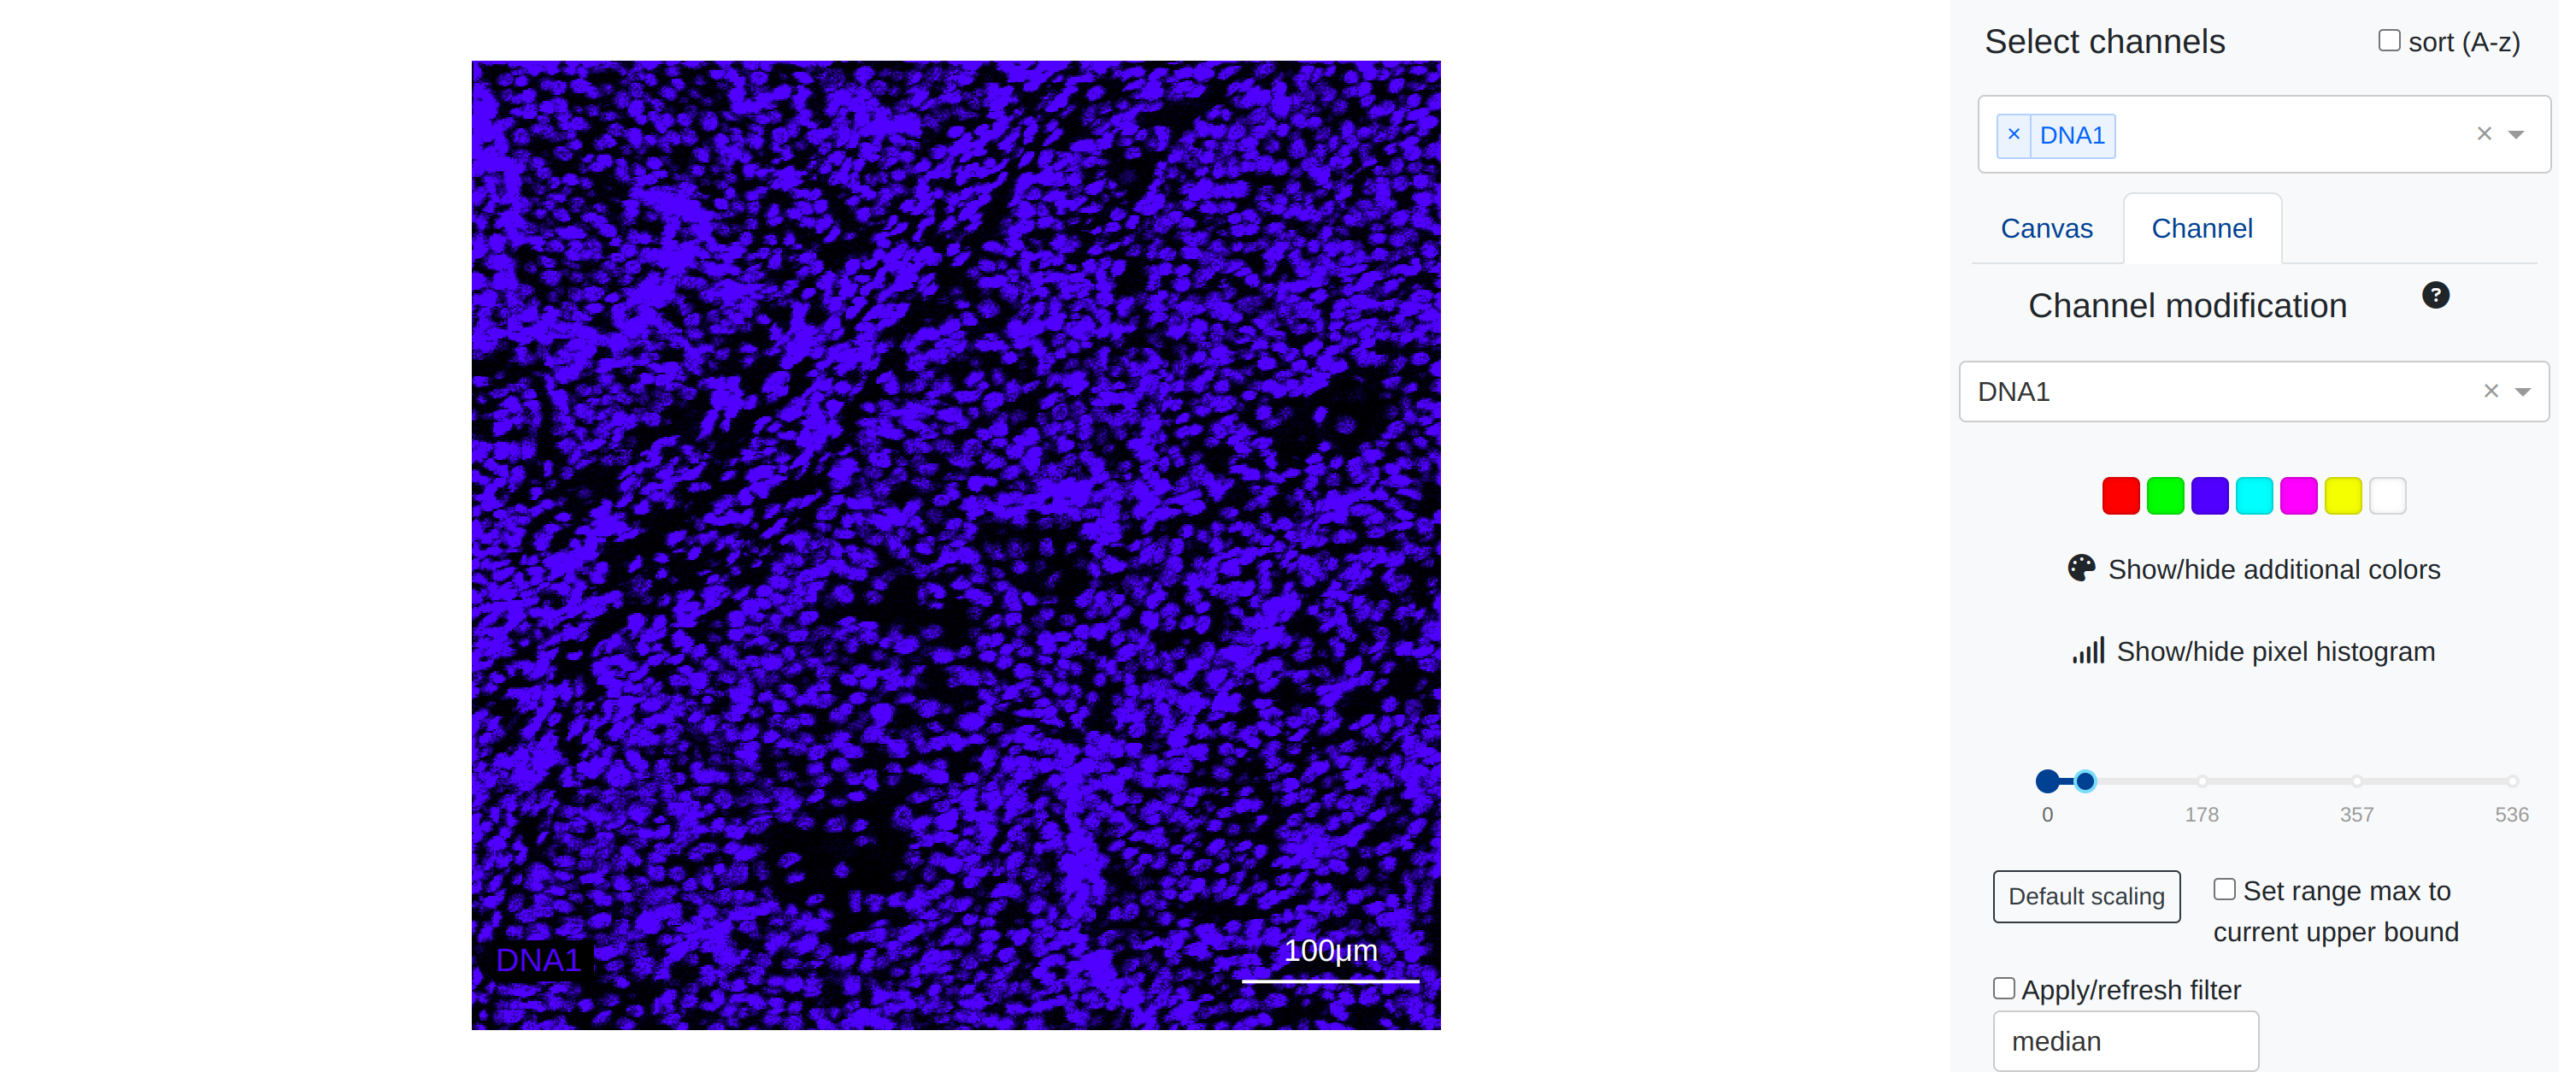
Recolouring
The most basic channel alteration involves recolouring the greyscale channel with an RGB colour. Users can select one of the 7 pre-selected standard colours from the box colour swatches under this menu, or select any of the colours available inside the colour wheel. Recolouring the current channel will apply the colour while retaining the relative brightness and pixel intensity of the underlying image. Below is an exaple of applying a blue recolour to a DNA channel:
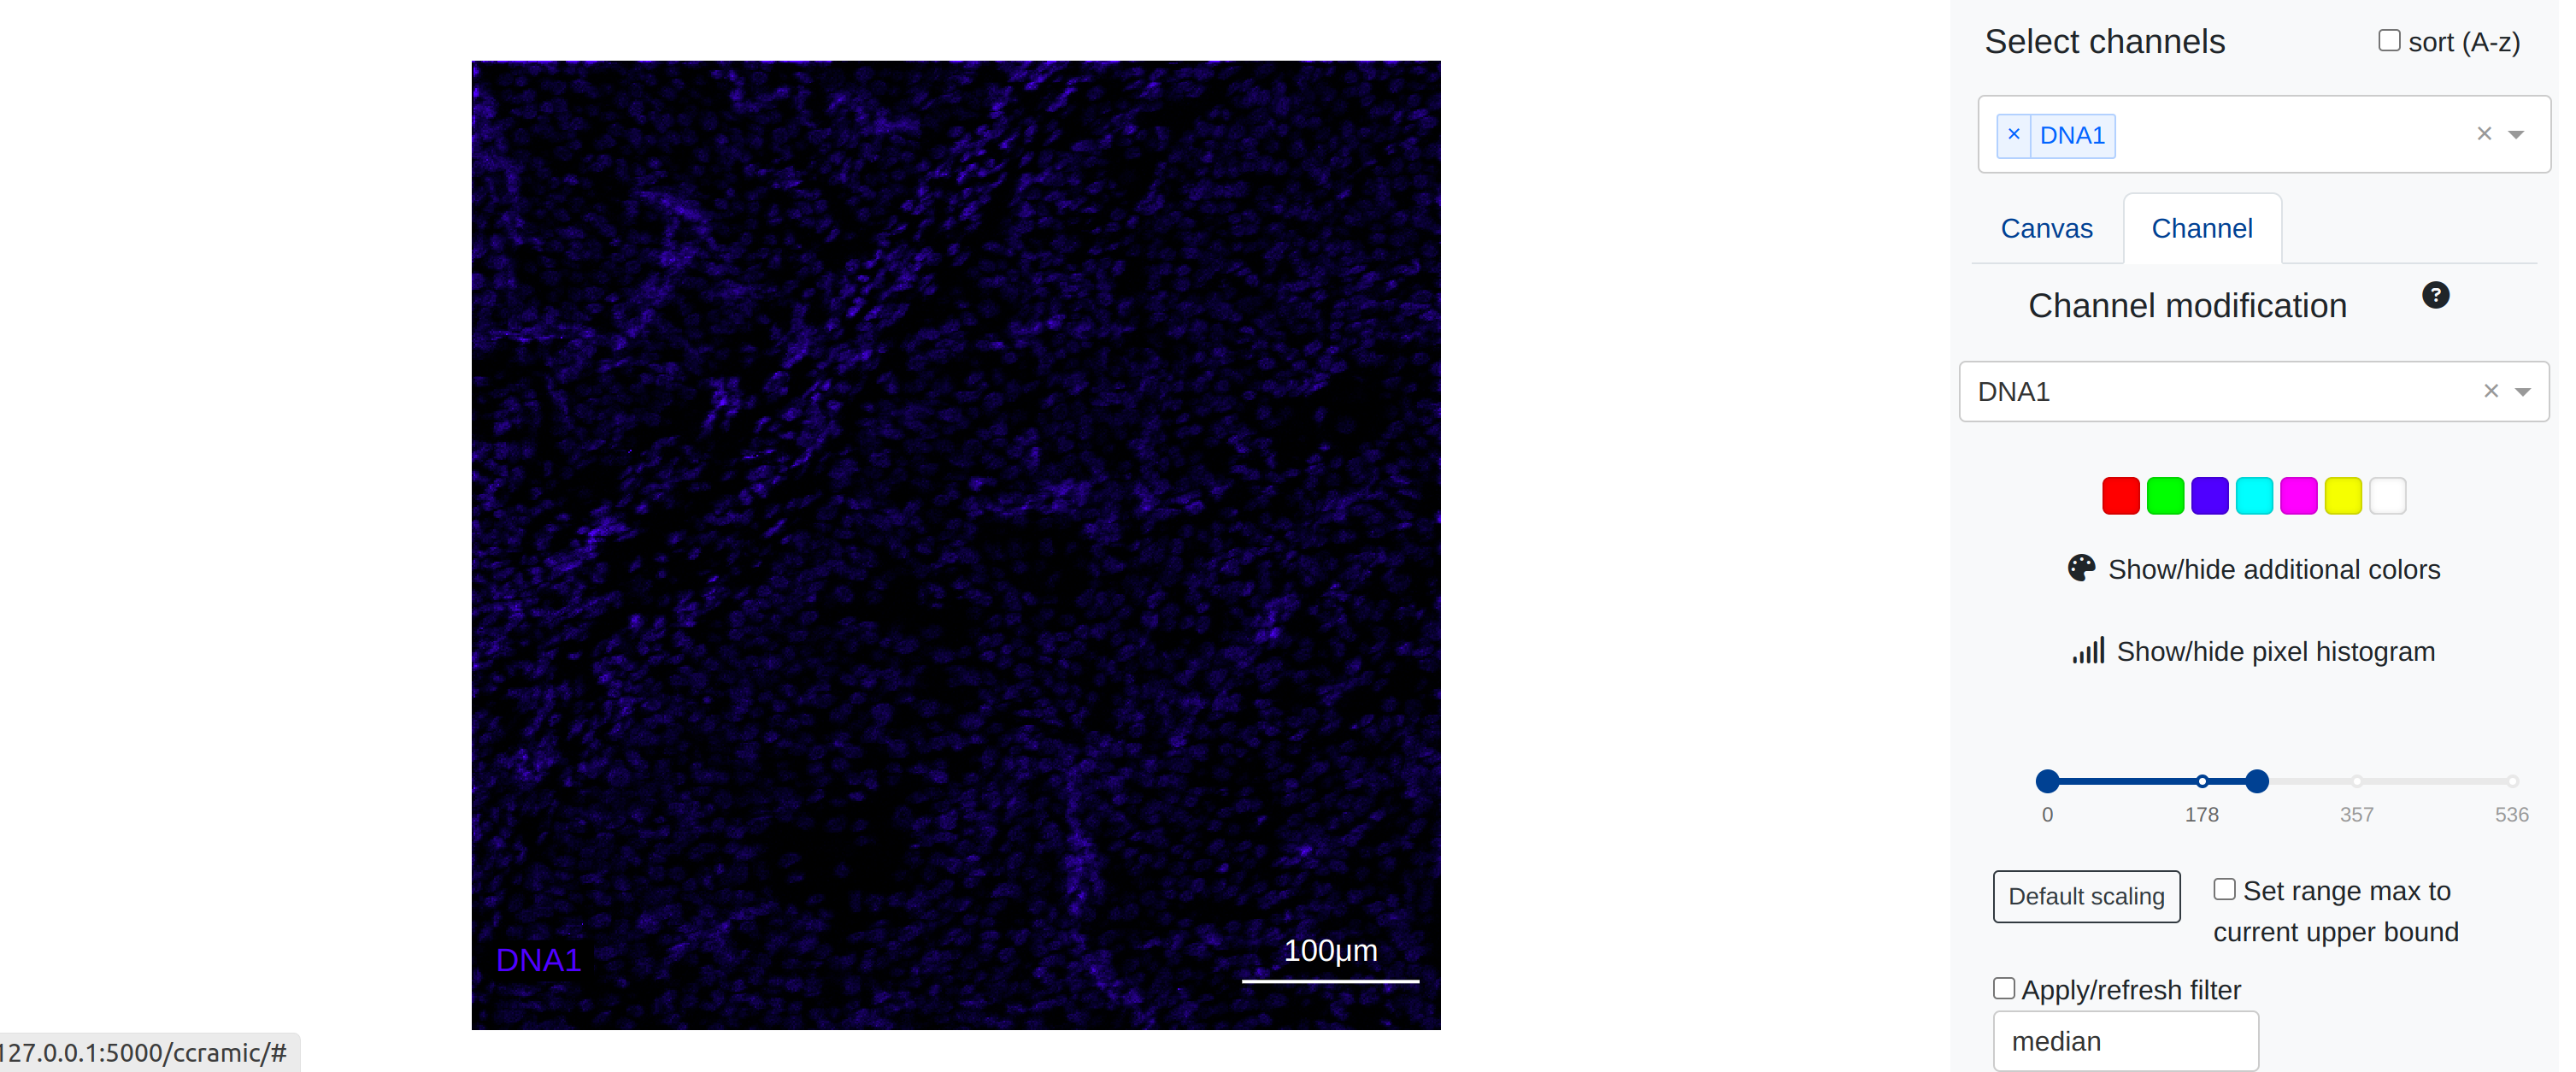
Scaling
rakaia provides a pixel intensity range slider just below the colour wheel, where users can adjust the pixel intensity and filtering of the pixels that are shown in the selected channel. The range slider consists of both an upper and lower bound:
- lower bound: This value represents a minimum threshold, where pixels below this value are not shown (cast to 0). The lower bound can help to eliminate background noise and remove the visibility of low intensity pixels, resulting in cleaner signal for higher itensity pixels
- upper bound: The upper bound represents the value at which pixels should be scaled up towards the maximum RGB intensity value of 255. Reducing this value will increase the number of pixels that reach maximum intensity, as it allows more lower intensity pixels to be scaled up. An upper bound value of 1 will scale all pixels up to 255 and represents the maximum saturation of signal available, whereas a larger bound (such as the array maximum) will produce very little visible signal.
Below is an example of a DNA channel that has been scaled up from a high upper bound (first image) to a smaller upper bound (second), indicating how signal can be amplified and saturated by reducing the image upper bound. Note that in the sidebar, the upper boundon the range slider has been reduced in the second image relative to the first:
Filtering
rakaia provides two types of image filtering for individual channels, median and gaussian filtering. Individual filters for each channel can be applied using the checklist directly below the pixel intensity slider. More information about median and gaussian filtering on images can be found here
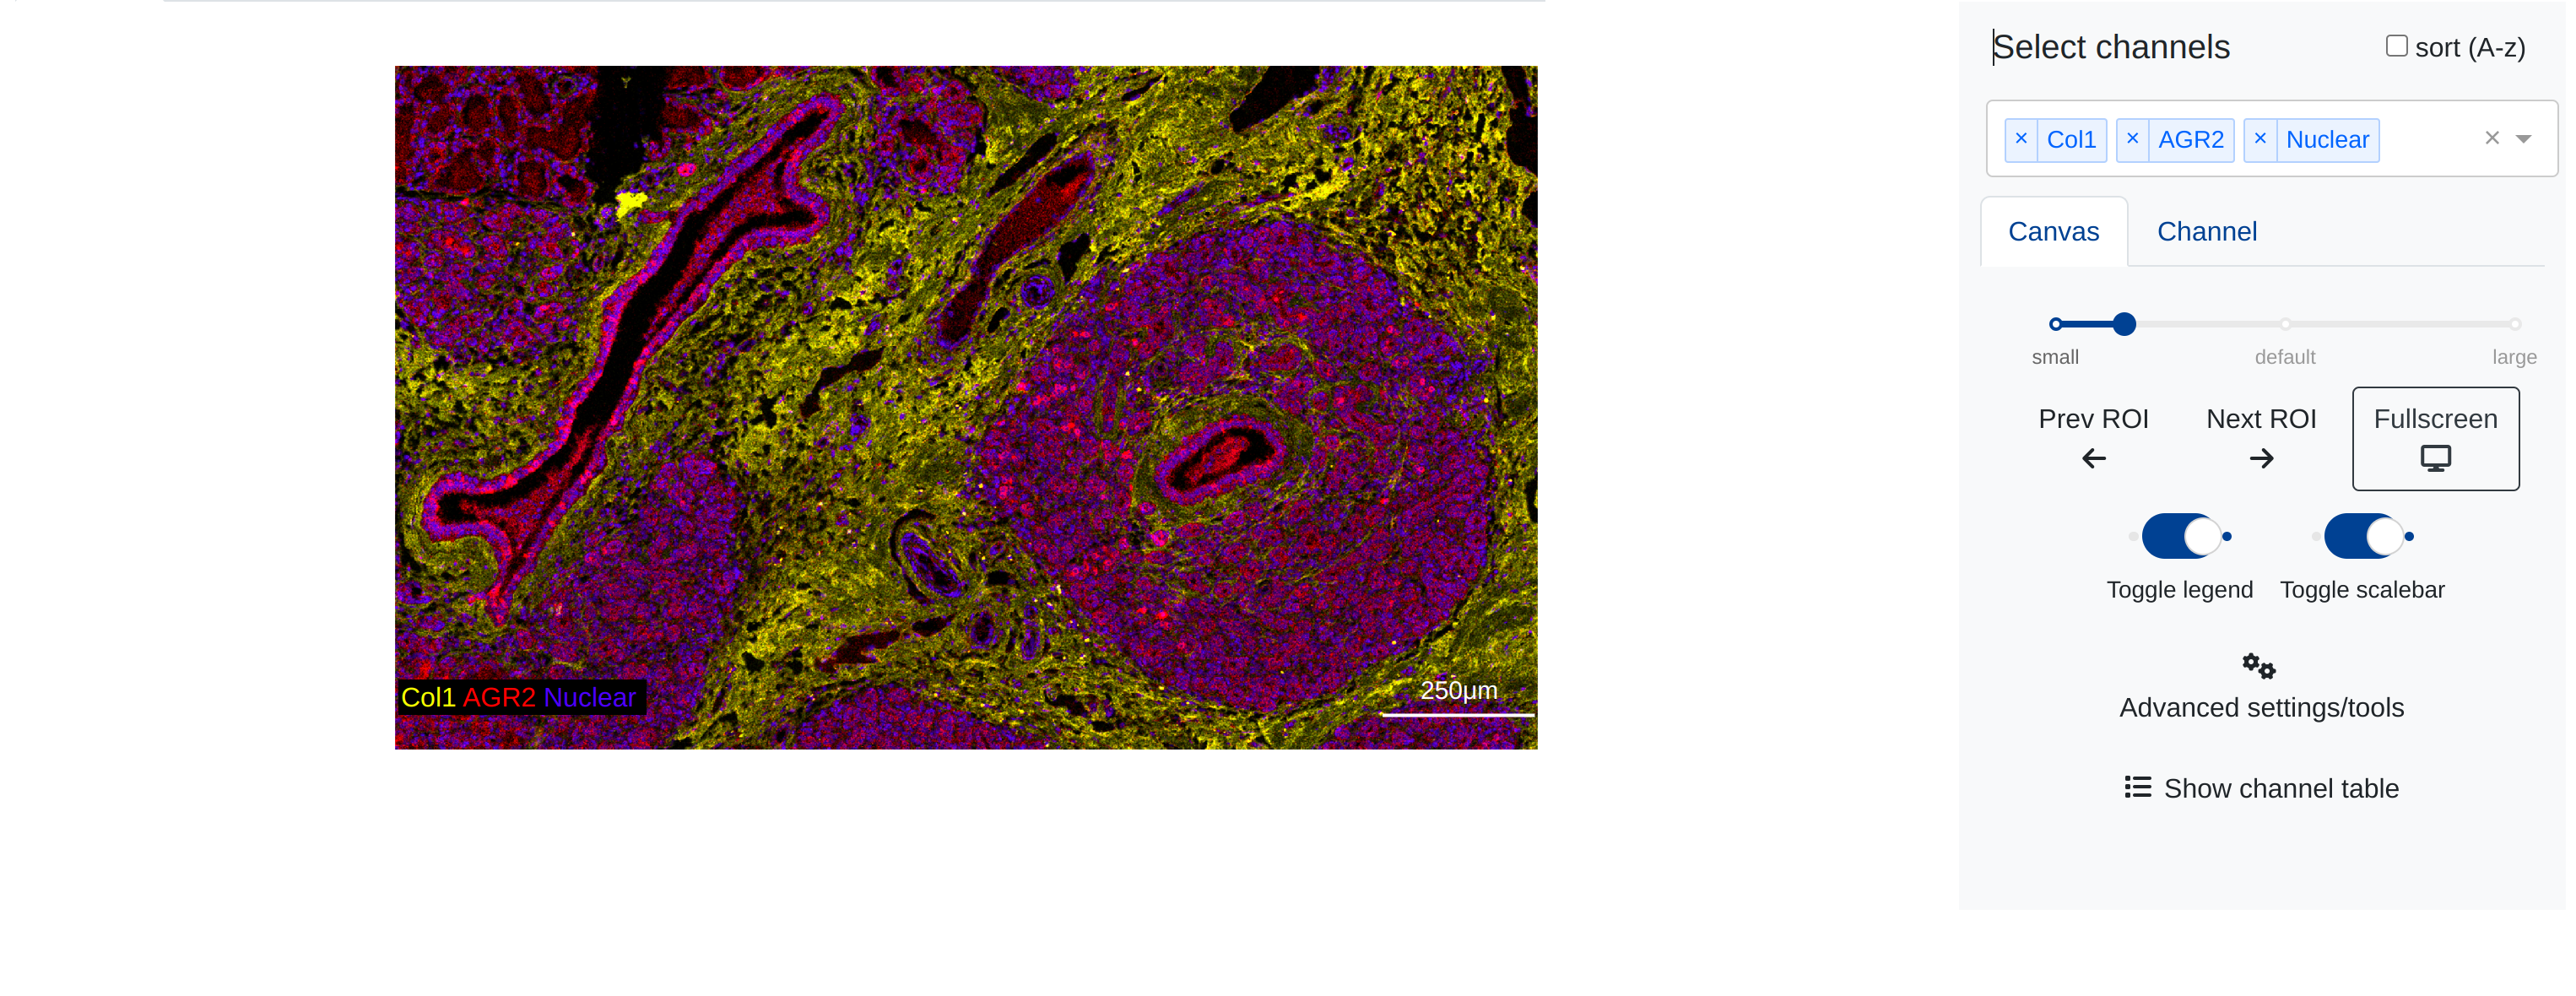
Canvas configuration
The main canvas will automatically update to show the RGB additive image of the channels that have been currently selected with their modifications. In this way, users can create customized blends of multiple markers overlaid together:
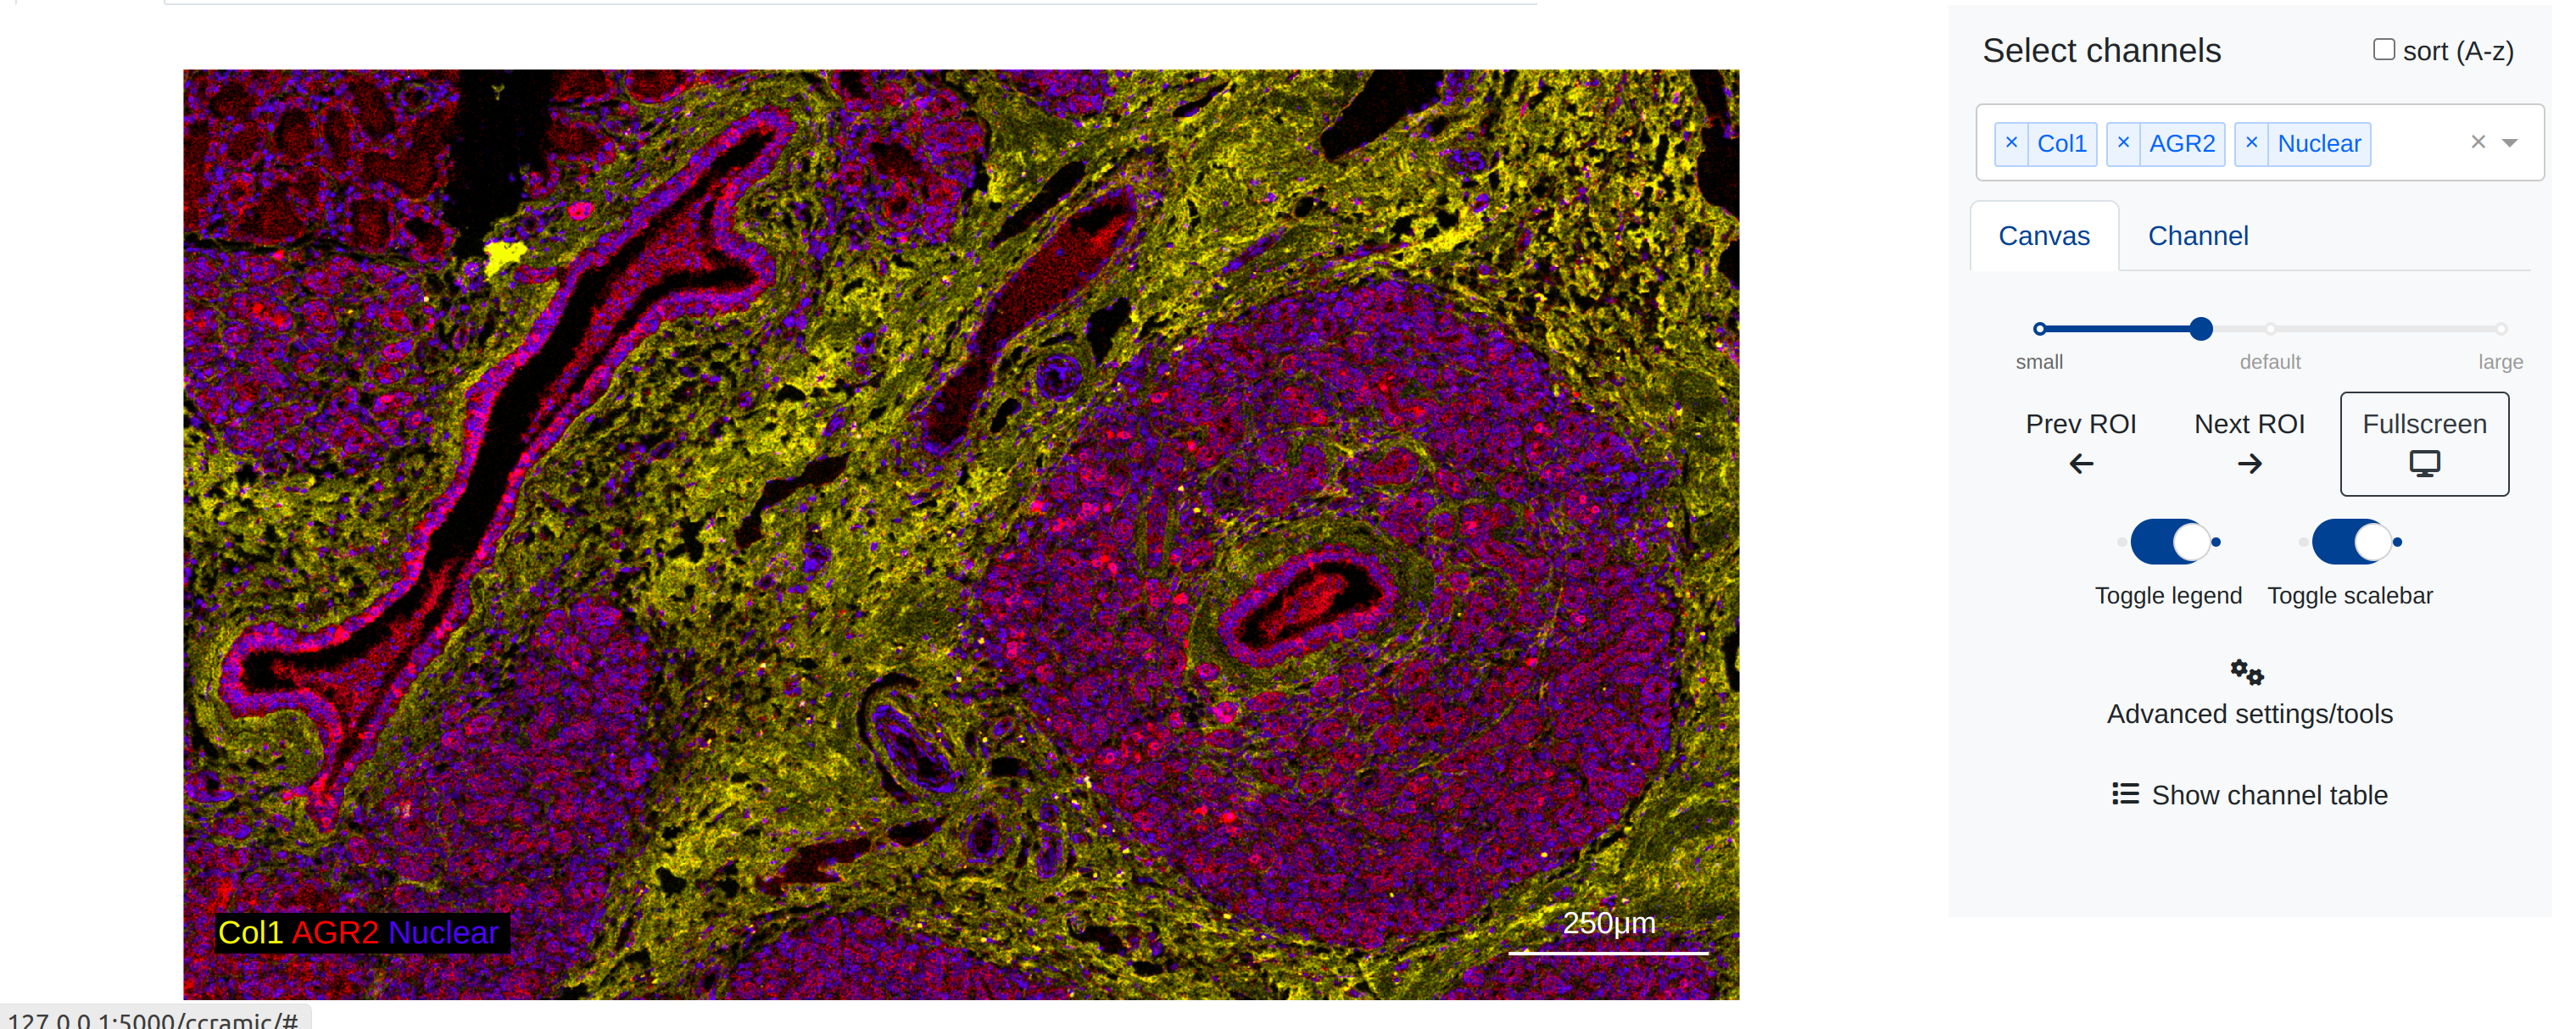
The canvas will contain the underlying blended image as well as annotations and shapes that are overlaid on top of the blend. By default, this will include a scalebar and legend with the labels of the channels in the blend, coloured by their blend colour.
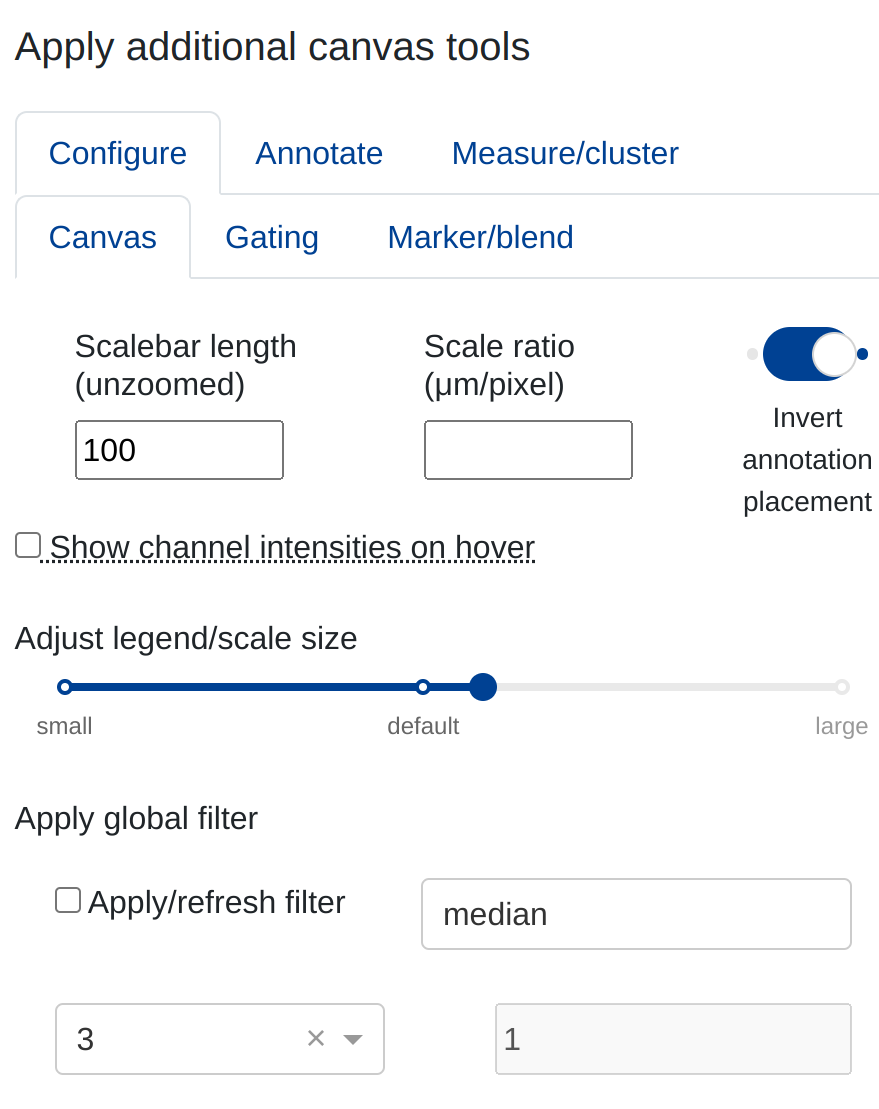
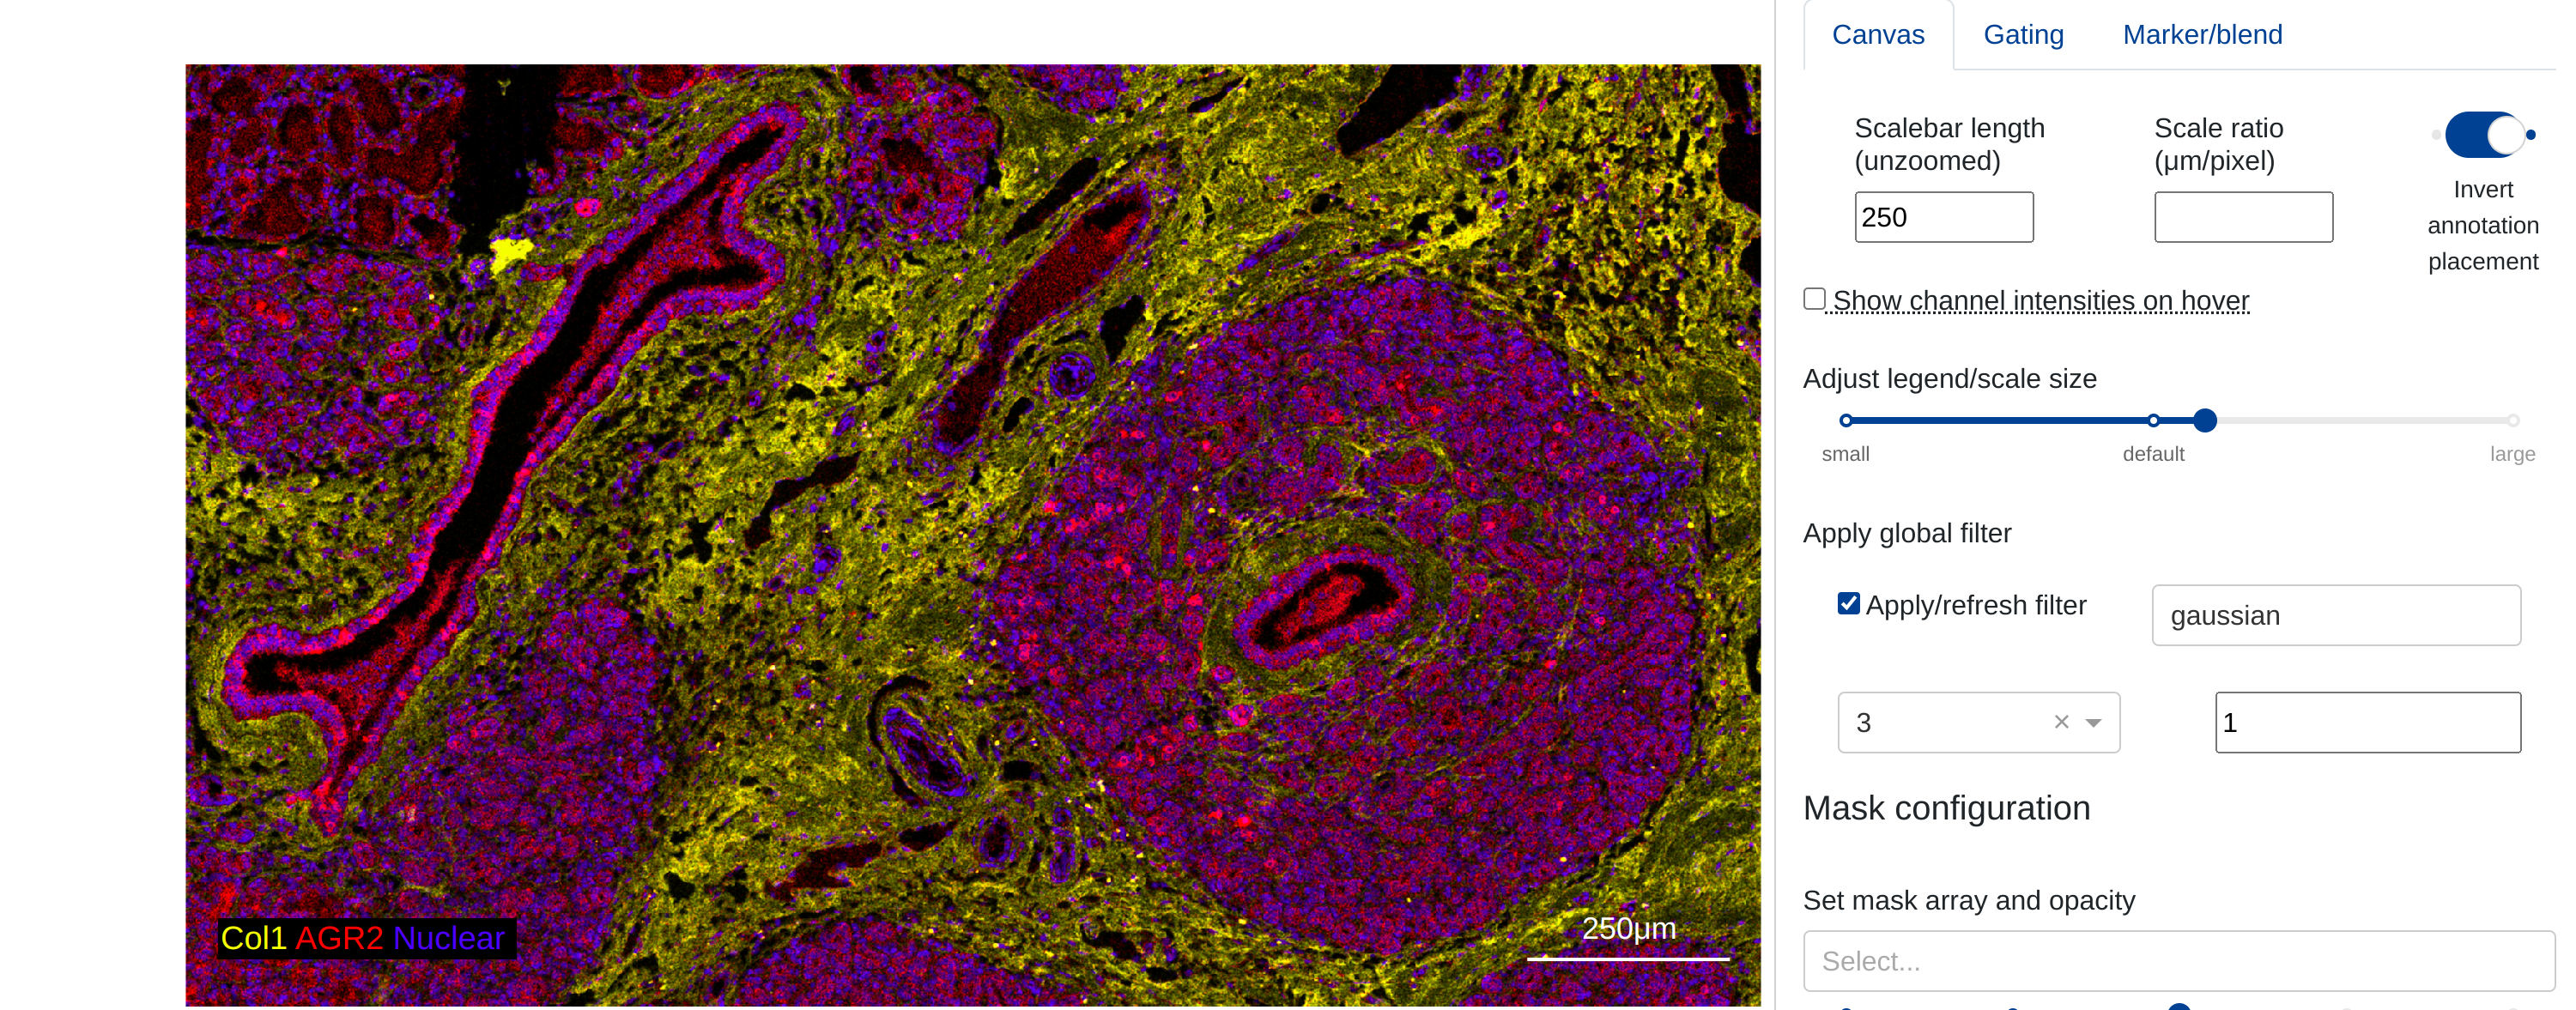
There are a variety of customizations that the user can make the to the appearance of the canvas, many of which are available by clicking the Advanced canvas options button in the channel modification menu. This will open a collapsible side panel with several inputs to change the visual parameters of the canvas:
Scalebar and legend
By default, rakaia will generate a scalebar that is 10% of the width of the image. This value can be changed under the Advanced canvas options button in the channel modification sidebar by adjusting the value under Scalebar length (unzoomed). It can also be made larger or smaller relative to the underlying image using Adjust legend/scale size, or hidden by adjusting the Toggle scalebar widget.
THe canvas legend will include a list of the labels of the current channels, with the lettering recoloured to the colour of the channel in the blend. Similarly to the scalebar, the legend can either be made larger or smaller, or hidden using the toggle. These inputs are found in the Advanced canvas options sidebar:
Canvas sizing
rakaia will automatically detect the input dimensions and aspect ratio (pixel width/height) of the current ROI and adjust the parameters of the canvas accordingly so that the ROI will fit in the viewport. The user can freely change the proportion of the canvas area that is comprised of the image by adjusting the canvas size using the Canvas size range slider: