Navigating rakaia & controls
rakaia shows up in the browser as a dashboard-style visualization application. The different primary tabs in the appication contribute to different analysis tools, and optional modals and sidebars provide user-defined configurations for specific analysis and visualization steps. This article summarizes the different UI components and rakaia and how to navigate the application.
Input and Output tab
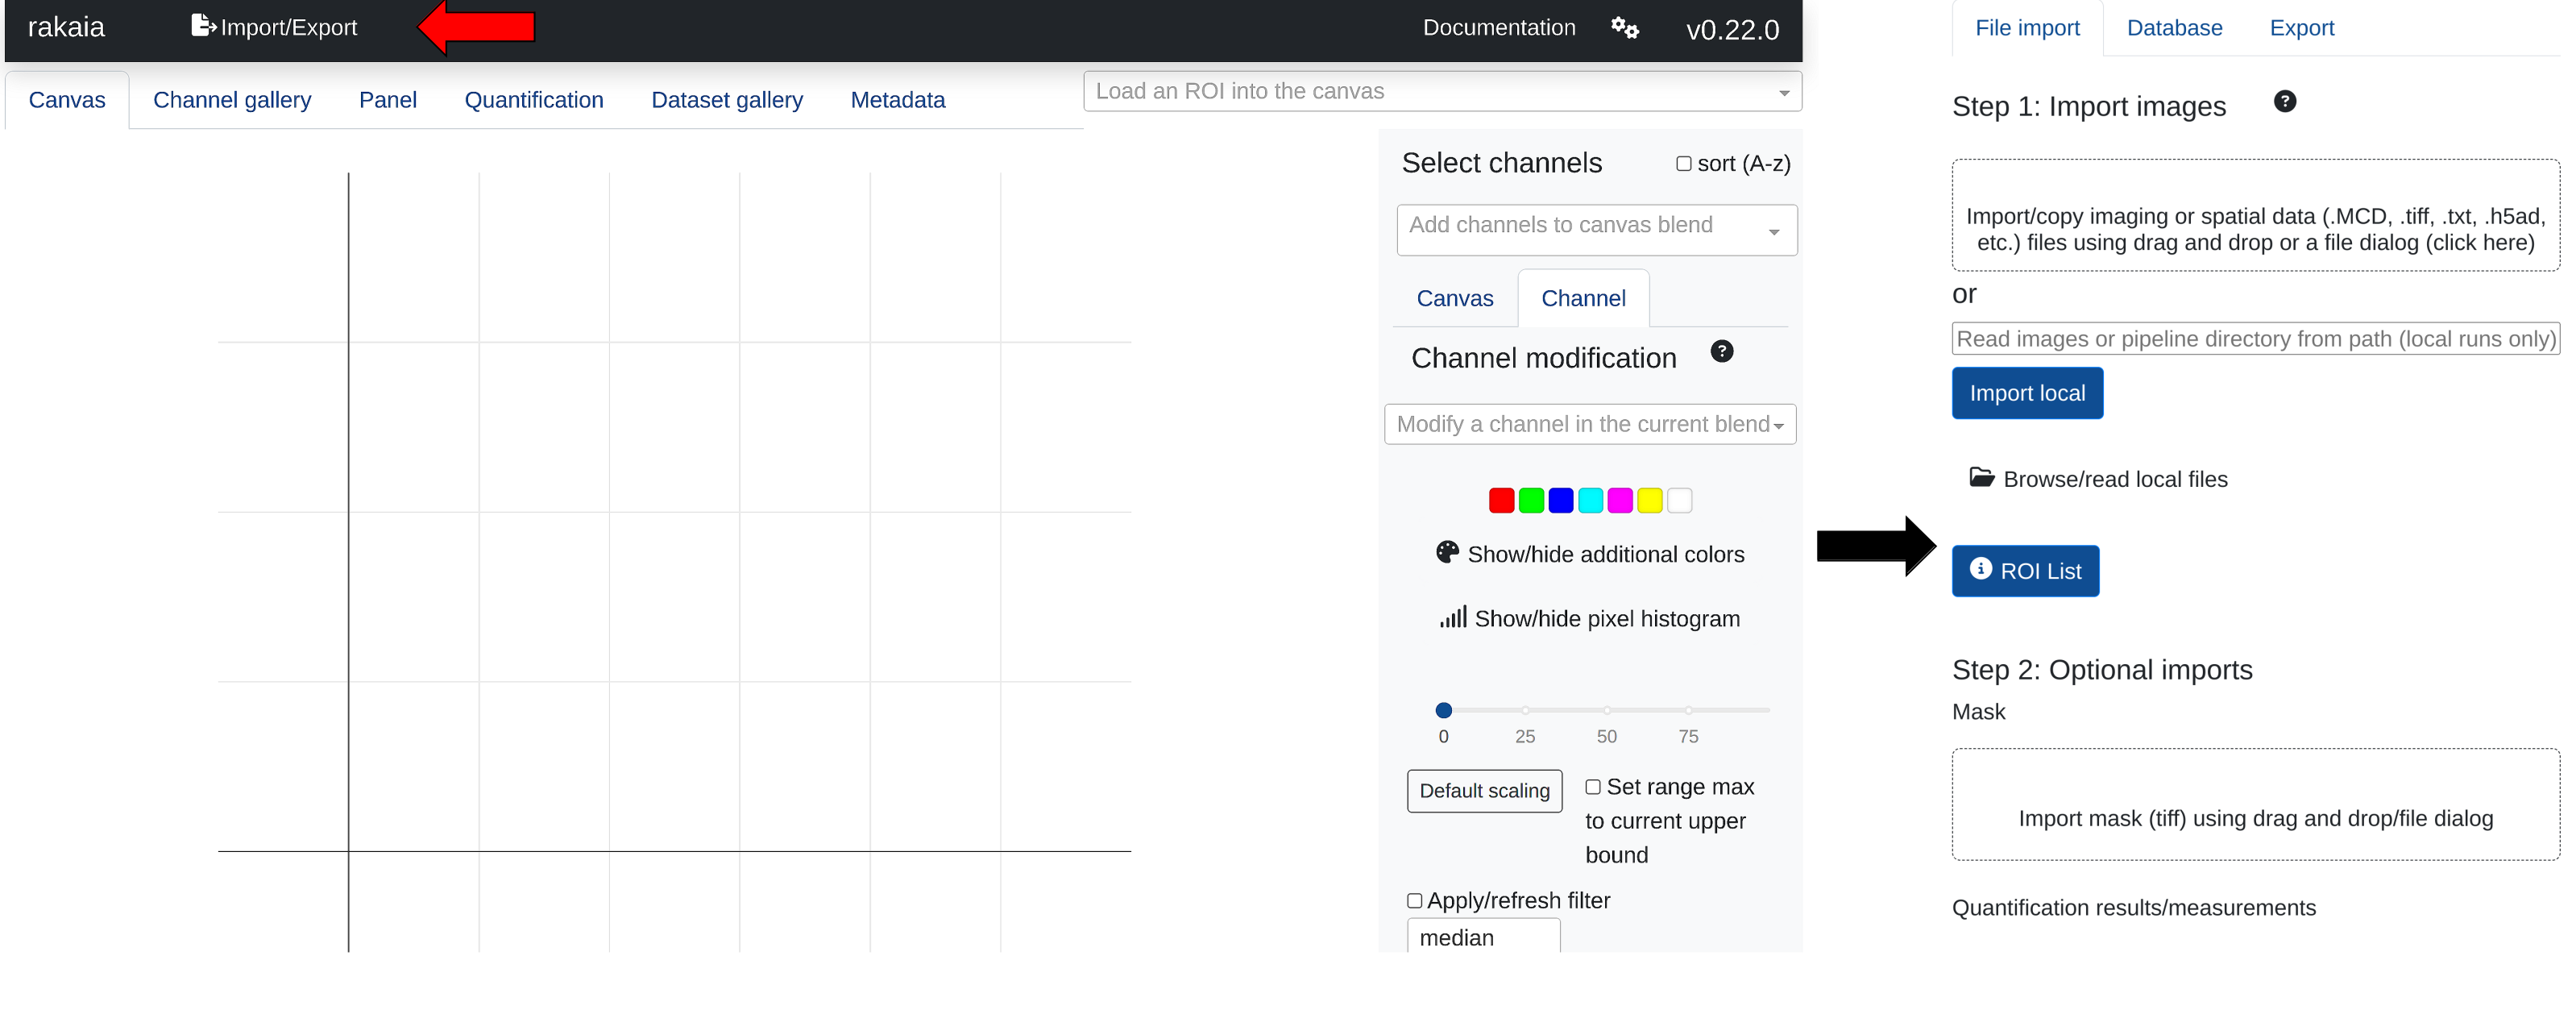
Upon opening rakaia, the sidebar for input and output files will be visible. Here the user will begin analysis by selecting files to visualize and analyze from a number of different input components. This sidebar is collapsible and can be re-opened by clicking the Import/Export button from the main application header on the left side.
Main tabs & navbar
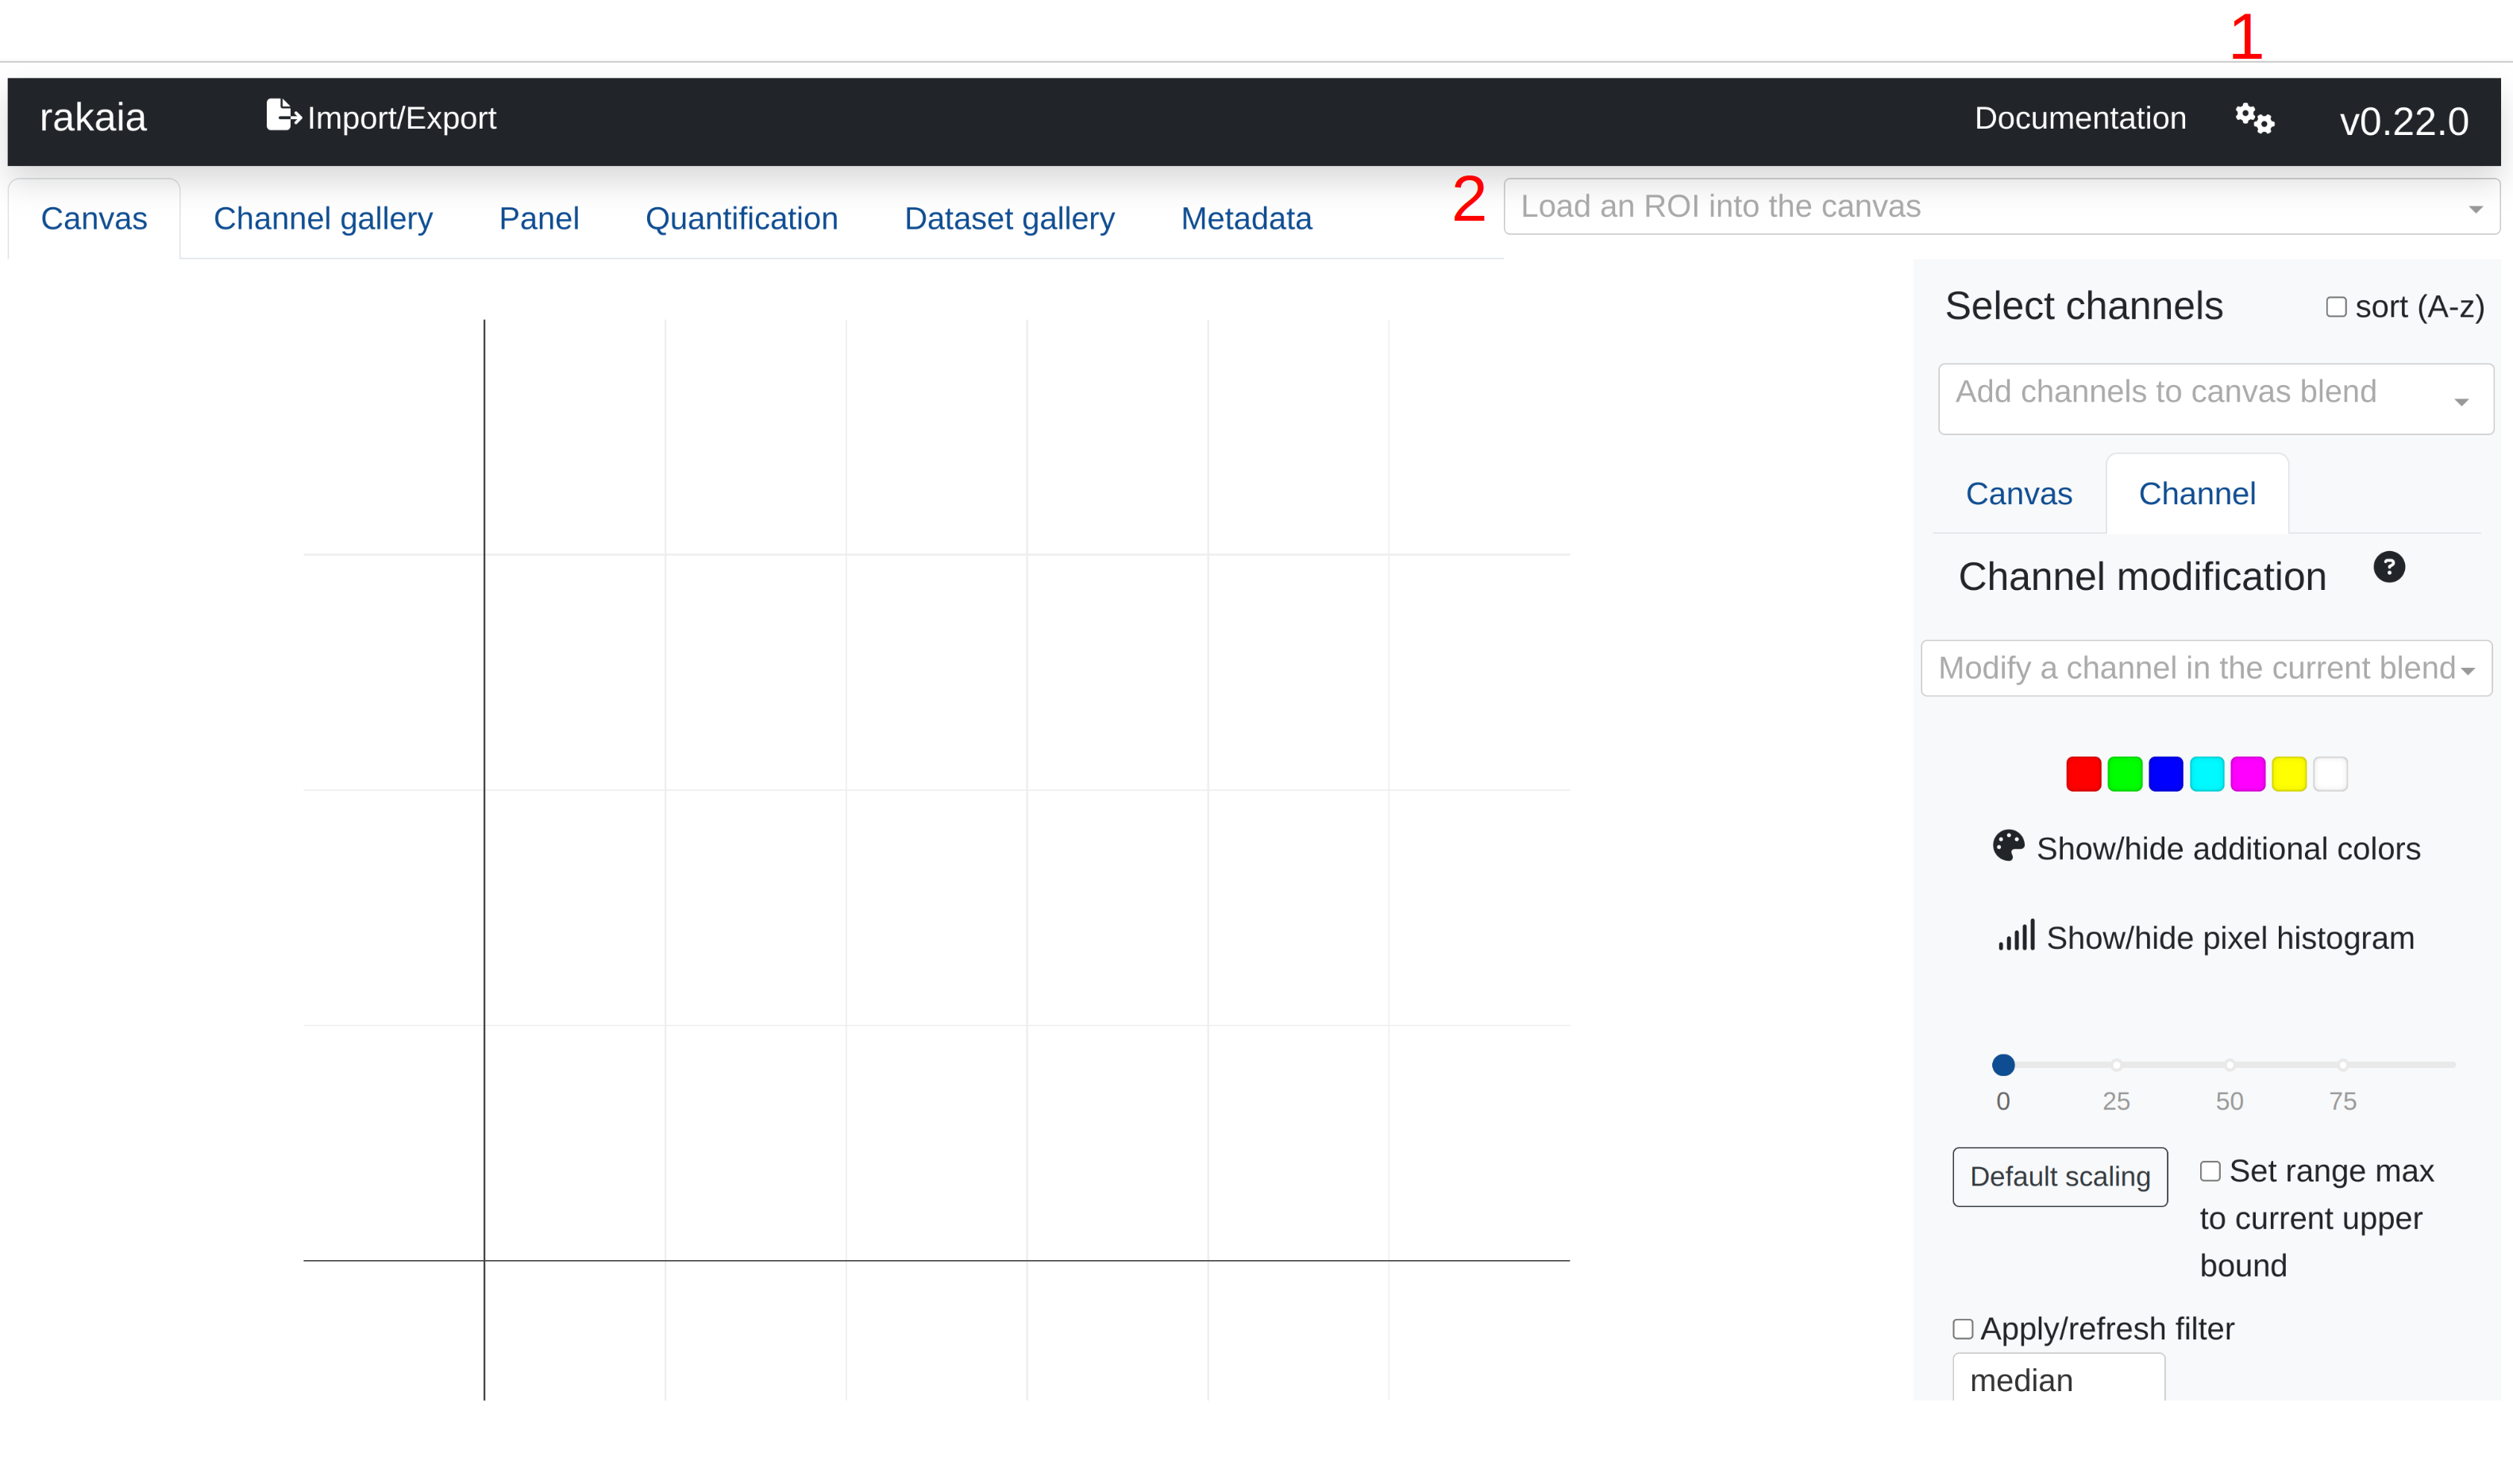
rakaia has a main black navbar with the application name, current version, external link to the documentation, and a 1. a button for additional application settings (seen as two gears). Clicking the documentation will link to these articles, and the additional application settings have a variety of session parameters that can be customized, but should not need to be changed often.
From the main dashboard the user will be able to see a series of main tabs corresponding to different analysis pages (such as Canvas, Panel, Quantification, etc.). Beside this is 2. a dropdown menu where the user may select any region currently loaded into the session to view in the main canvas tab, which is the default.
Default tab: canvas
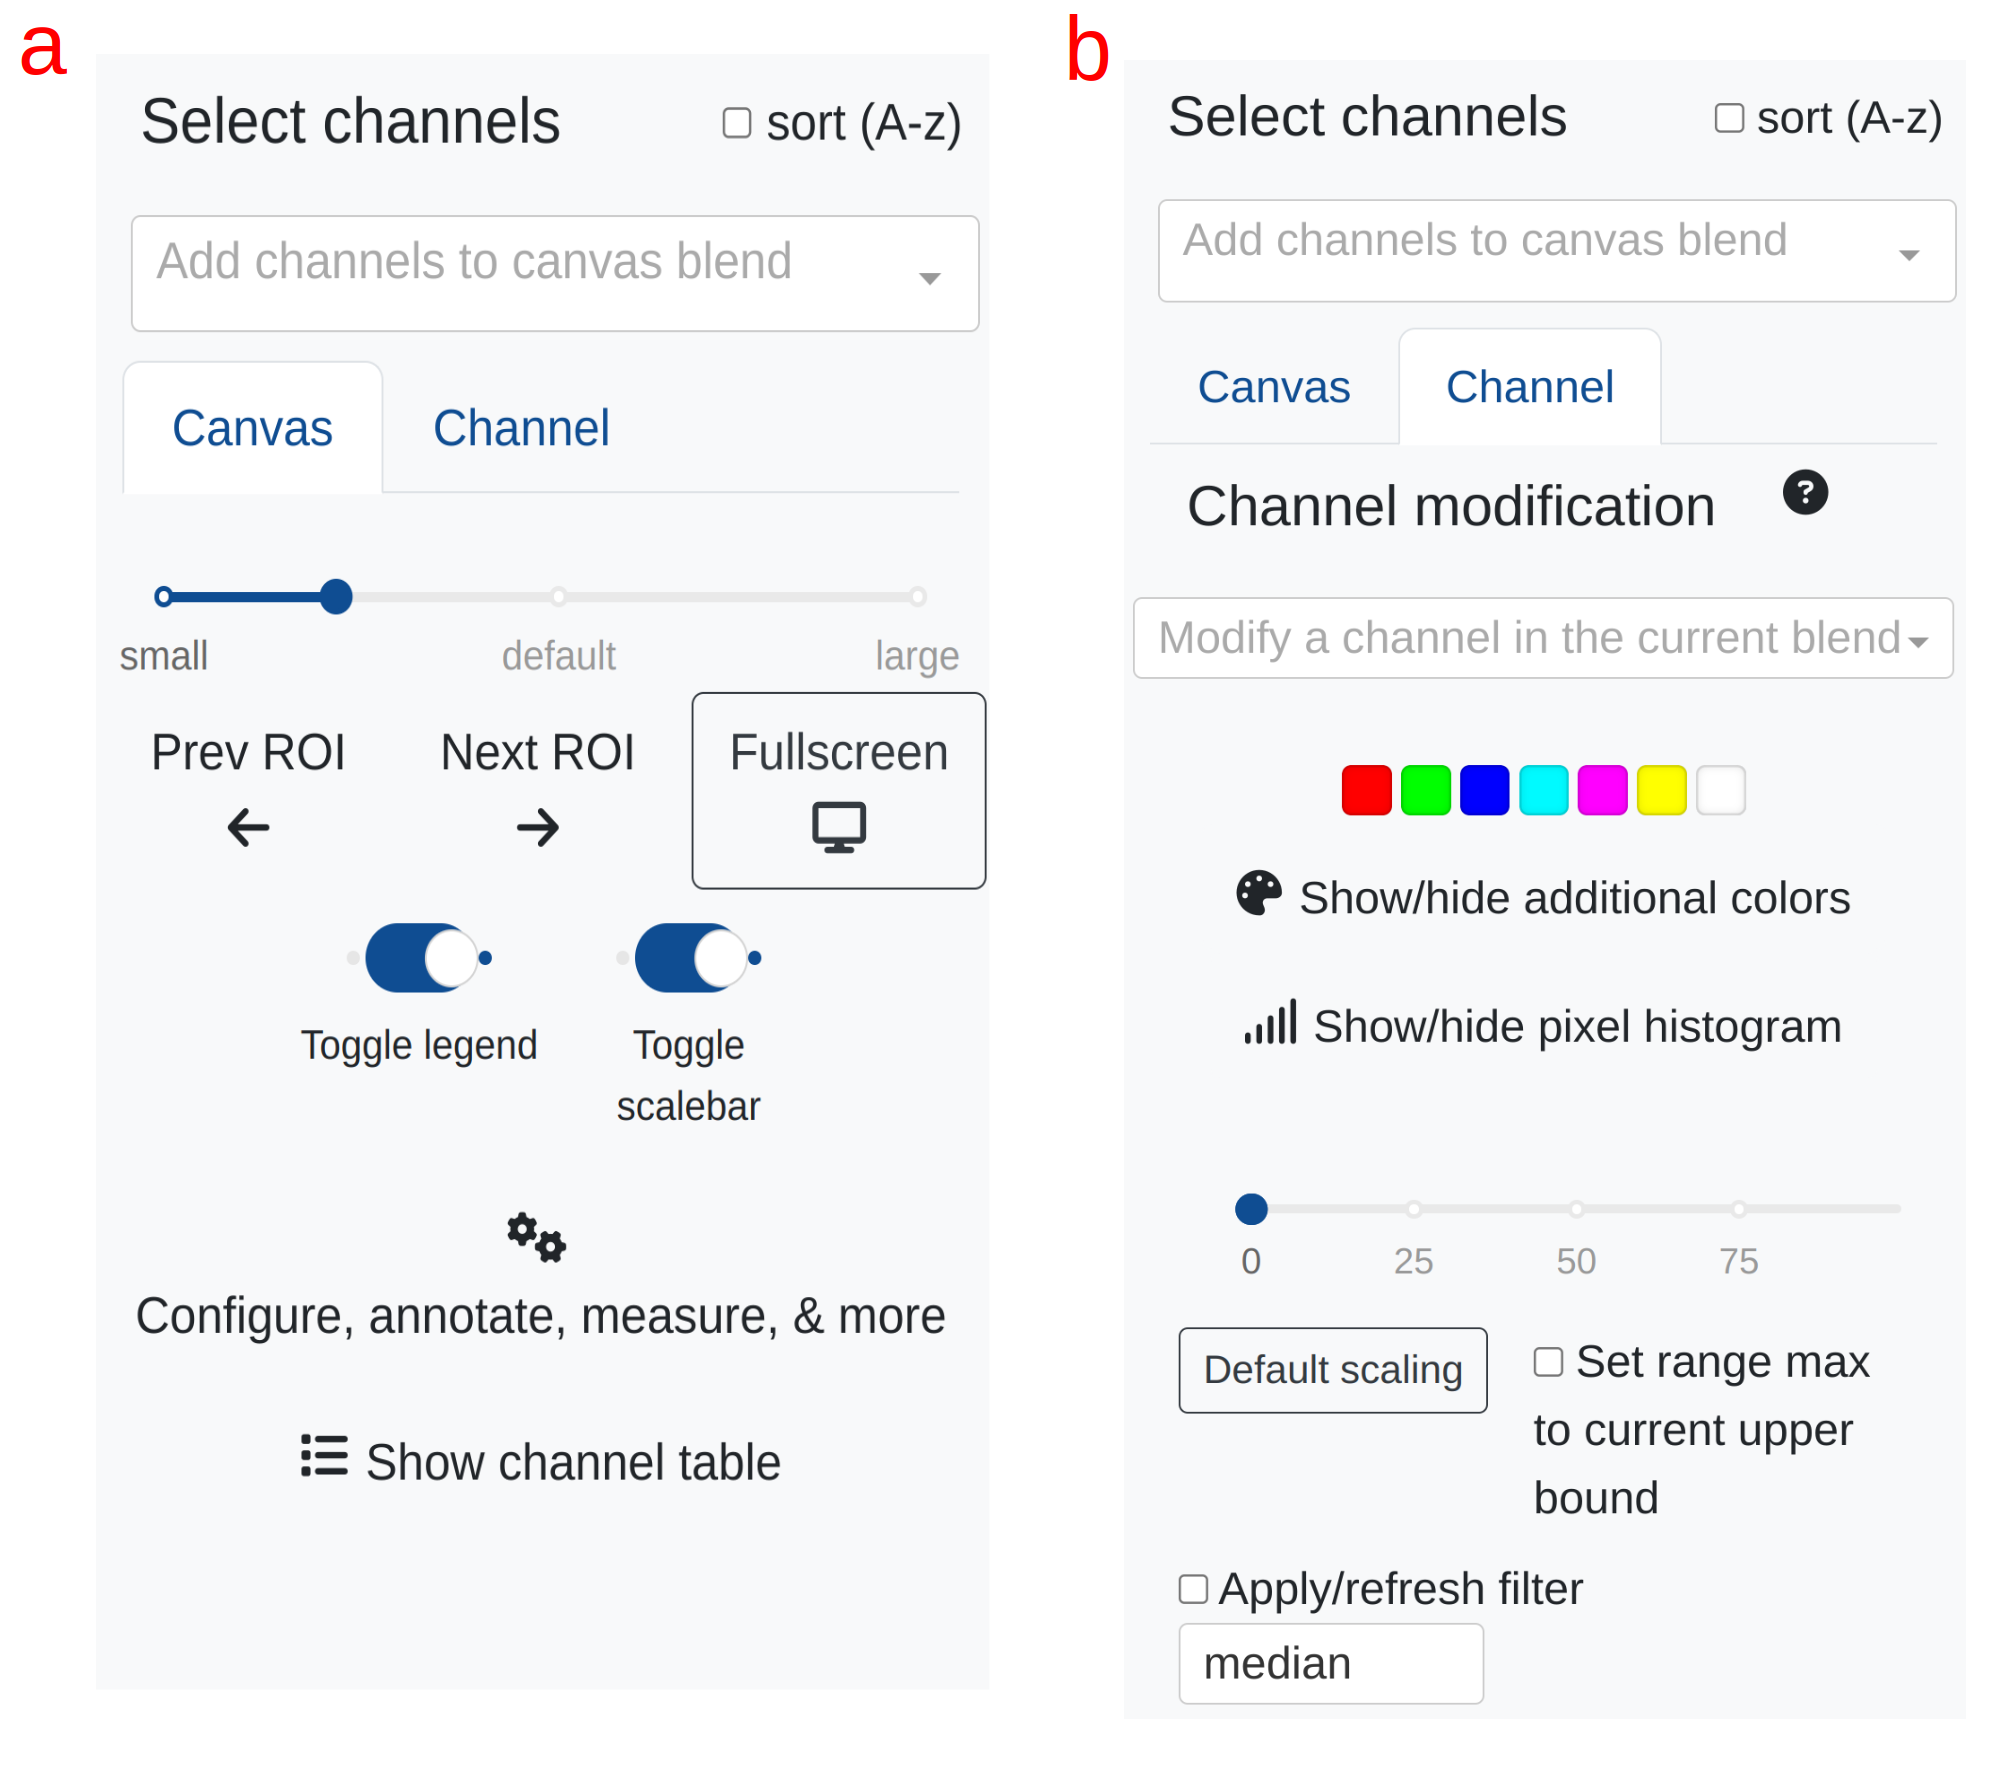
The default main tab for rakaia is the canvas, which contains the main image component where blended images can be made from one or more channels. The main canvas is accompanied by a sidebar on the right that holds user selections for channels, as well as modifying the canvas. The sub tabs Canvas and Channel in this side bar allow user to switch between these options.
The Canvas portion of the sidebar controls aspects of the visual appearance of the canvas such as its size, presence of a legend/scalebar, and other commonly used user configurations.
Switching to the Channel sub tab shows the user input configurations for any channels in the current image. For more information on how to use the channel-specific inputs, as well as create images in the main canvas, please visit the pixel analysis article.
Additional canvas tools
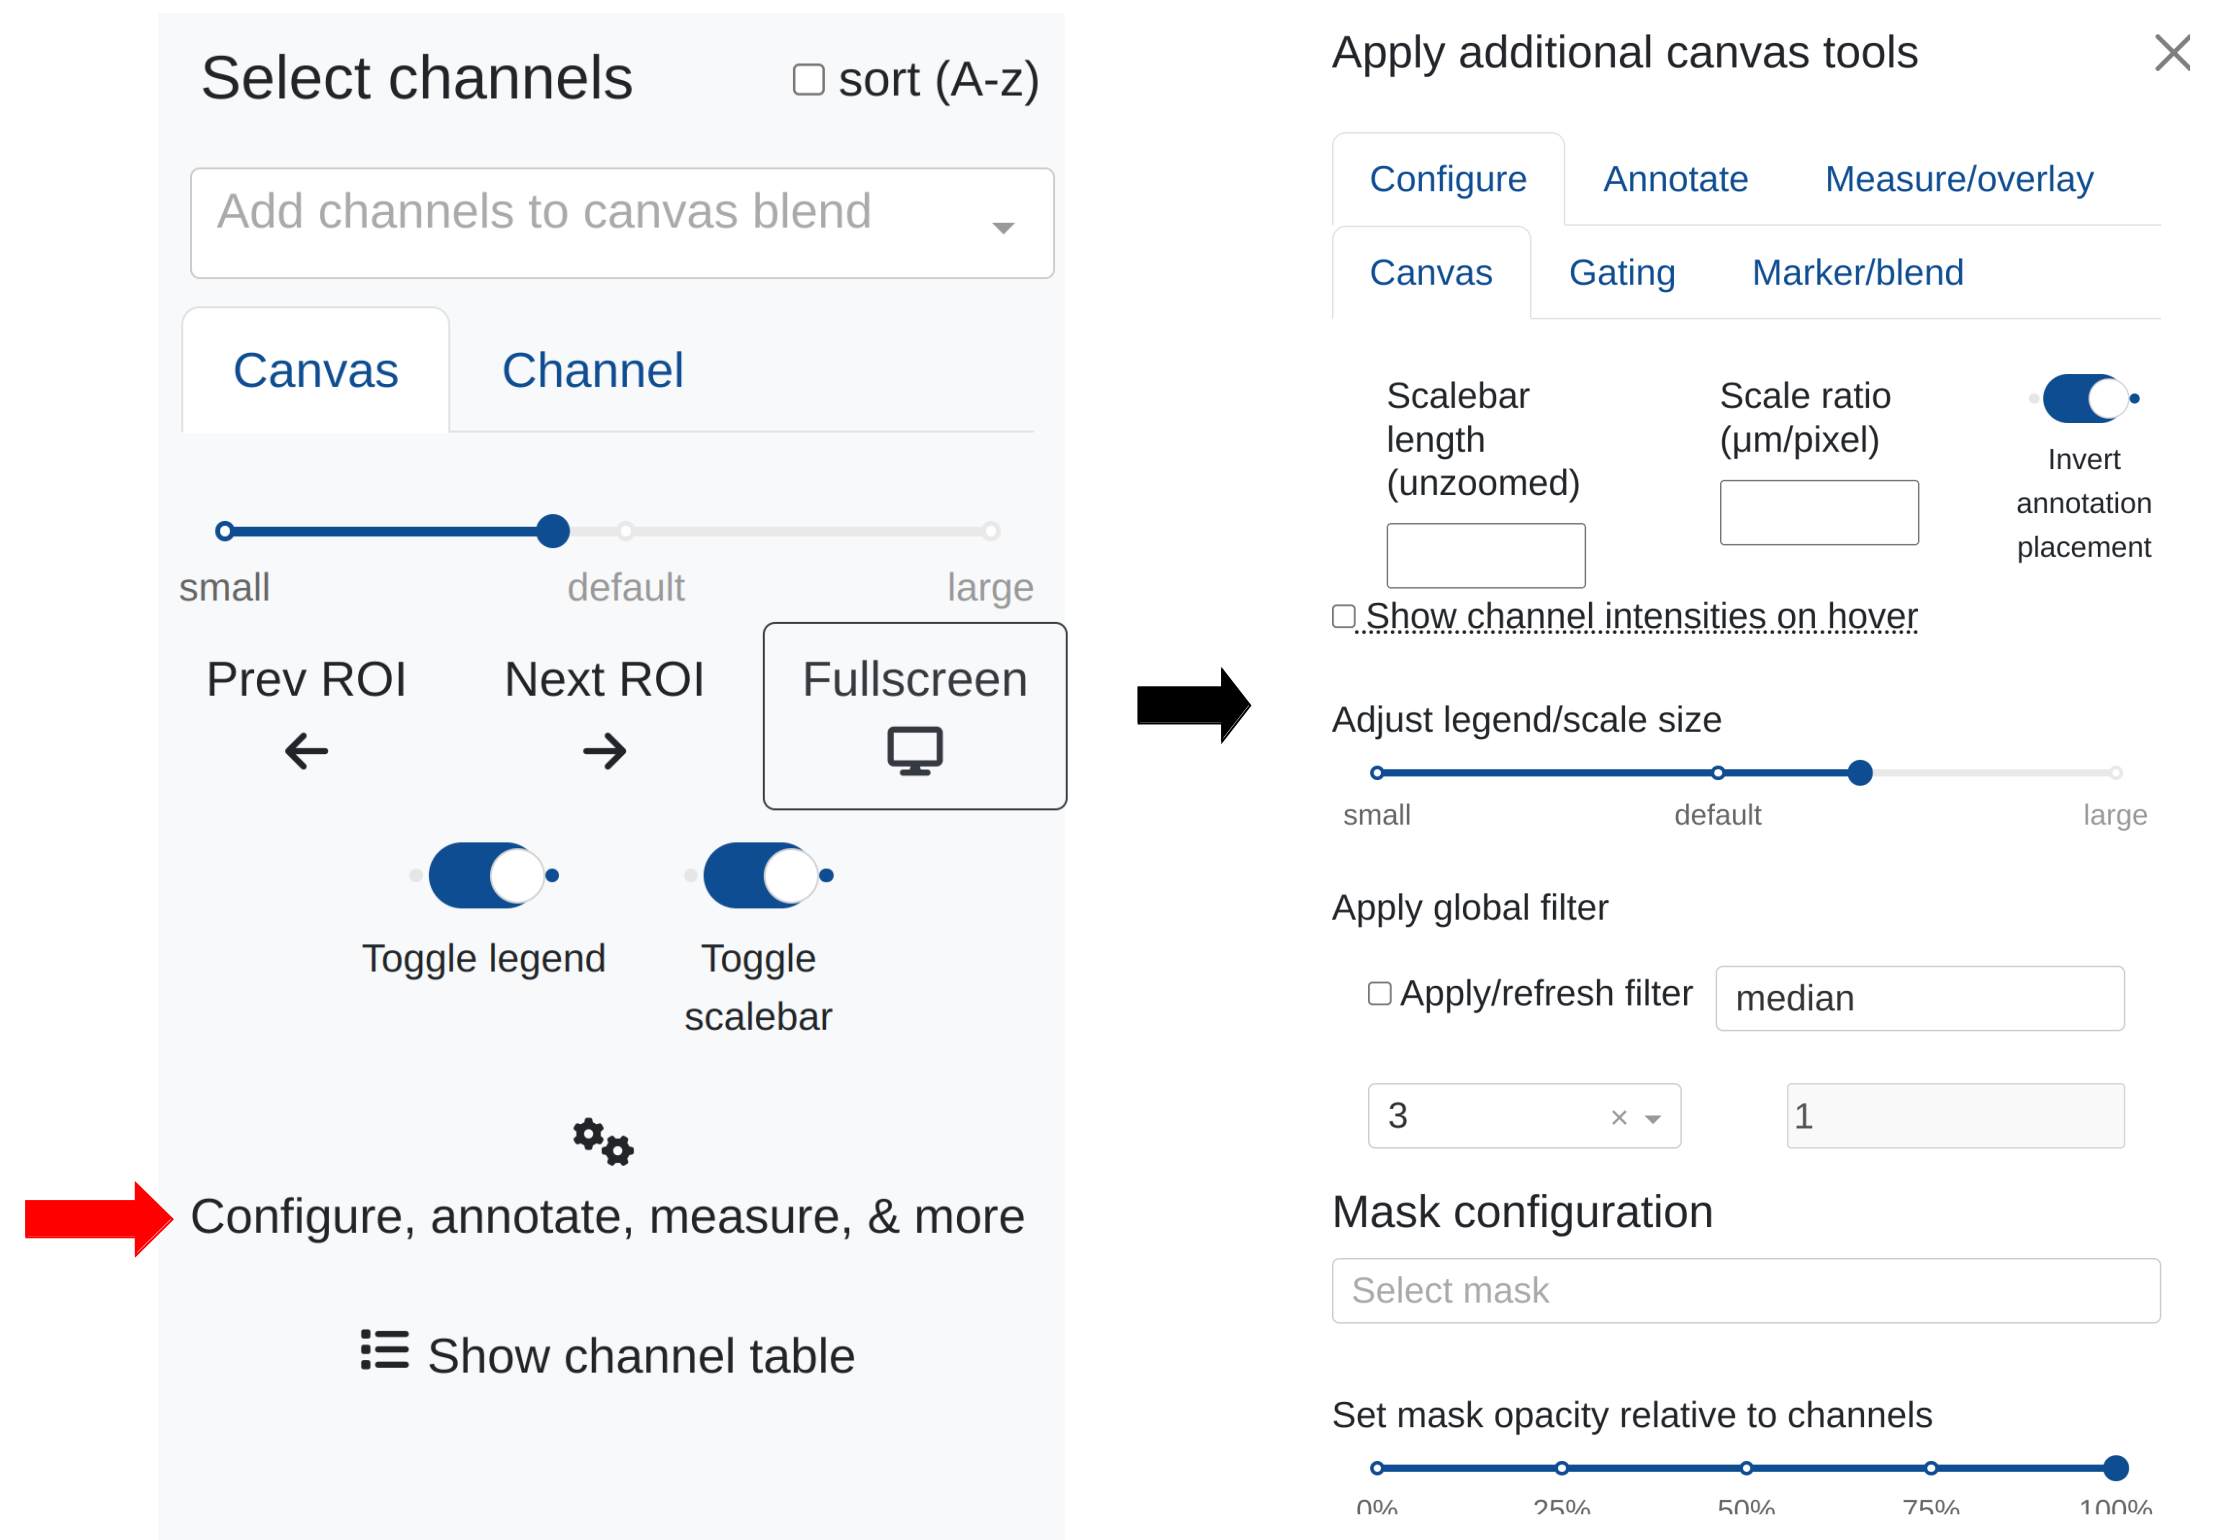
Within the canvas sub tab, the button named Configure, annotate, measure, and more provides an extensive side tab of additional analysis tools that are specific to the canvas. This includes additional canvas visualization adjustments, object masking, region and pixel annotation, and even more. This side panel is arranged into several nested tabs that are described in pixel analysis canvas configuration
Additional tabs
The following article sections further describe the features and function of the other primary tabs:
- Channel gallery: Tile gallery in data import
- Panel: Editable Metadata table
- Quantification: main quantification article
Keyboard shortcut controls
rakaia provides a few keyboard shortcuts to quickly perform some useful actions in-session. These are currently controlled by the arrow keys are shown below with the associated action:
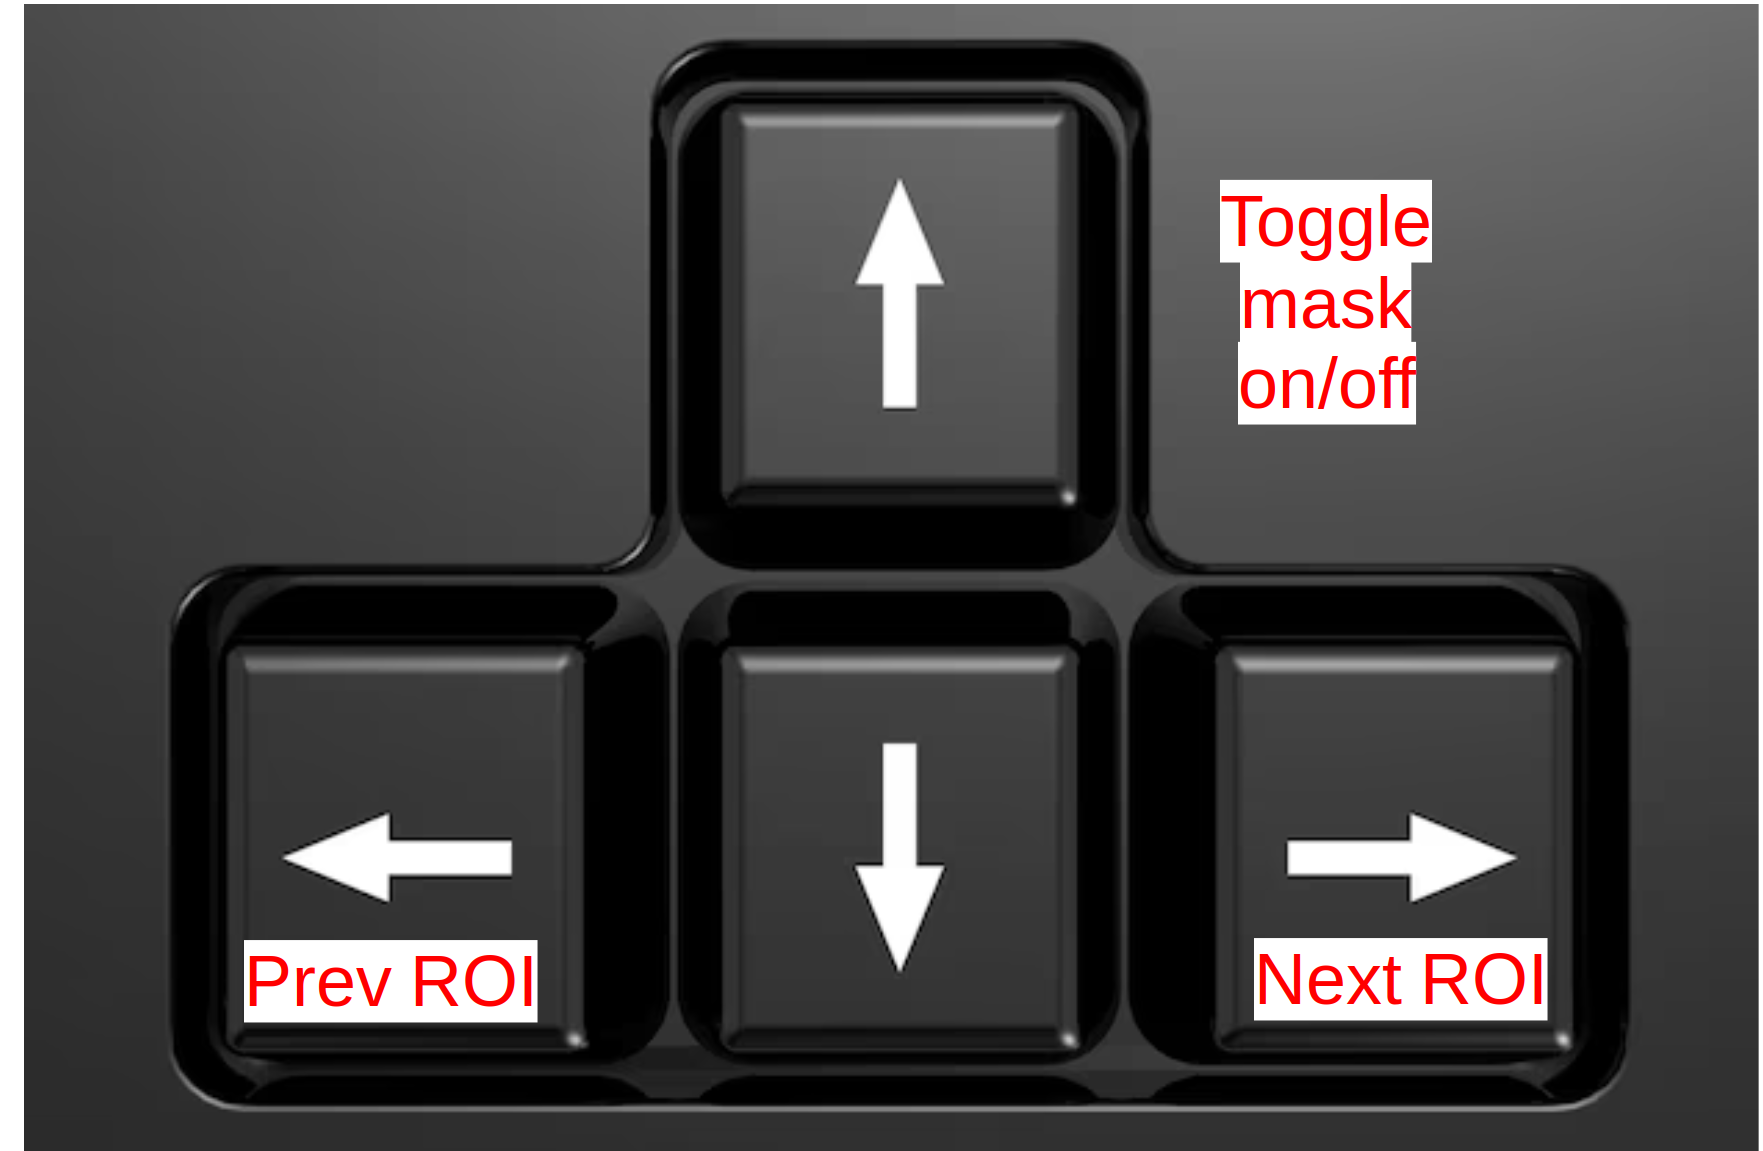
Pressing the forward or backward arrow keys will switch the main canvas to the previous or next ROI in the dropdown list, relative to the current ROI. If this ROI doesn't exist, then there is no action.
Toggling the up arrow will toggle the ROI mask on or off. This can be useful for quickly viewing and removing a segmentation overlay on the canvas while retaining the current zoom level. See masking blending for more information.